What's the best thing about attending and teaching at Stampaway in Cincinnati each August? Easily it's meeting up with old friends and making new friends. This year my dear friend Mike Meador, owner of Coffee Break Designs, was sorely missed by so many of us, and certainly by me. His wife, Chris, is on my right above and the new proprietor of Coffee Break Designs, Kris Hubick, is on my left.
Mike's booth was always my first stop, and it wasn't just for the quirky inventory, but for a chance to visit with him and Chris, always a highlight of my Ohio trip. He was witty beyond words, never without a smile on his face, and the wink of mischief never far away.
Chris was gracious enough to give me a pin to wear with his photo and everytime someone would comment on it, I'd get teary eyed and have to walk away for fear I'd cry in front of a crowd. He was loved and he is missed, but I'm so glad I got the chance to visit with Chris again and to meet Kristin face to face.
Sharon was the only one of my local girls to attend, for her fifth year, and we were both exhausted when we returned home Sunday. The good news: according to an email from her yesterday, we've both caught up on some much needed sleep now that we're back in NC.
Another friend is Carol, whose husband Gil spent more time with me on Friday than she did. We found ourselves together on an elevator ride and after an hour of chat outside the classrooms, parted ways; he to search for a local coin shop and me in search of food!
Carol has attended 2 of my art retreat weekends, and like several others, she wanted to know when the next one will be held. Start looking at your October calendars girls!
I failed to get photos of Mary Jo McGraw, Cecile, Connie or Tammy. I was too tired to think straight and never once pulled out a camera while we were on the show floor. Michelle and Anne from St. Louis invited me to their room on Friday night after the Preview Party for our annual show & tell. We missed Lori, who didn't attend this year, but still managed to eat pizza and laugh til 3am!! And again I didn't take a single photo. Sheesh!
I did get to visit with my pal Barb, even had a chance to sit and eat with her during the Friday night event. She was dolled up here for the Flower Power theme. When I asked if the curly locks were hers she said "Yes, I paid for them"! Too funny. I got a big hug and wouldn't you just know, she was covered with glitter, which meant of course that I was also covered with glitter for the rest of the night. Help me Rhonda!
Greg of Marco's Paper was over-the-top fabulous as always. One big flower. Yep, that would be him.
Ted, at the Stamper's Anonymous booth, took flower power in a completely different direction. How divine is he???
I failed to get a photo of my dear friends Joni & Mark, owners of Artful Illusions, but I did get one of Lemon Drop. Isn't he a jewel? And I liked his shirt so much that I bought one for myself. (Actually bought 2, but one was the same artwork he's wearing, just in a lovely shade of brown to flatter my blonde hair.)
More to come, including photos from all 3 of my classes. Thanks for dropping by and do come again.
Tuesday, August 16, 2011
Monday, August 1, 2011
Art House Display Guinea Pig Class
Yesterday afternoon I had a few "guinea pigs" over for a test run of an upcoming Stampaway class. I designed this class so that everyone had the same set of supplies but was curious to see if they'd be uniquely different.
For a guinea pig class I put out 10 times what I'll pack for an actual out-of-state class, so options were overwhelming. Roofing choices included vintage tickets, miniature playing cards, fortune cards & zodiac cards from old vending machines, Chance & Community Chest cards as well as Monopoly money, Funny money from another game, wooden sticks, wooden nickels, wooden tape measure pieces, cigar box bands, cigar bands, buttons, and a huge wooden cigar box filled with every kind of game piece from dominoes & checkers, to Monopoly houses & hotels, bingo markers, tiddly winks, and oodles more.
I also had photocopies of old train tickets, war tokens, & tape measures of every color. I just knew the tape measures would be a huge hit, but alas, I was mistaken. Another option were photocopied sheets of letters and numbers, which were also not chosen. At CHA there was a picket fence in the Ranger booth, with each picket stained a different color with their line of Distress Stains, so I put out coffee stir sticks as well as decorative wooden sticks which I could just envision stained and applied to the roof of a house. I guess not seeing that picket fence in person explains why no one went for the wooden rooftop.
So the big surprise was that everyone used the vintage tickets. Sharon & Michele went for the green ones while Mary went for faded red. Sharon added cigar box bands at the top and on the edges. Michele had her Martha Stewart fringe scissors so she used funny money on the eaves of her roof, which she turned into fringe. Mary used a piece of corrugated cardboard across the peak of her roof as an accent.
Here's a close up of Sharon's roof, and I see she also included a row of the red tickets.
This is Mary's roof. Notice how she turned her tickets to create the look of tiles overlapping one another.
And this is Michele's roof with the green tickets turned so that the holes were lined up on the outer edges. But look closely at that fringed money. Way cool!
Each kit also included strips of stamped tickets (images by Invoke Arts). Mary used individual tickets on the back of her house with rows of them under the eaves on the front.
Michele added a wooden nickel on the back and used the ticket strips on the front.
Sharon used ticket strips on the front but used just her metal elements and eco board on the back.
The final note I'd like to add was that I had a pack of 250 sheets of paper, with about 2 dozen already pulled out, and everyone made their selections from the ones I'd originally chosen. Michele narrowed her choices down to 3, all with green, but in the end changed her mind and went with a collaged pattern in browns.
Sharon went with a beautiful blue, which isn't a color she uses much, but at the end, her color palette for the entire house could be found on the shirt she was wearing.
Mary had never taken a class with me and had certainly never been anyone's guina pig, so I really didn't know what to expect from her. She worked slower, taking time to experiment with different embellishments, and that was interesting to watch. When she commented that she wanted a clock to go with a ticket that read "the time is now", I pulled down a jar full of watch faces & parts. The one she selected was white and everyone encouraged her to add color since nothing on the house matched that stark white. And of course they were right as we pointed out options for adding color to metal.
A new product I brought home from CHA was Inka Gold by Viva. This is a waxy colorant that you apply with your fingers and buff with a dry cloth. Their advertising calls it a metal gloss paint, but it's not at all what you'd expect. If you scroll back up and click on the individual photos of each house where Tim's Ideaology frames and coins are featured, the photo will enlarge so that you can look for the detail.
On Mary's frame she chose a green and applied it just on the oval ring of the frame. On Michele's house she chose a pink and applied it in the same way on the frame but completely covered her metal coin that says Believe. On Sharon's house she used gold and covered the entire metal frame. In person, it was a fabulous yellow. And when you look at that photo, look at the imagine coin. She added the yellow over the entire thing and then highlighted with the pink.
I wasn't sure about packing them for the class but the girls made the decision for me. It's a must have for everyone to try.
I confess that a bonus for me as an instructor is wandering around a classroom to view the color choices people make. You can always find someone who loves purple in a large classroom, or the girls who go for the shabby chic look.
And while the houses were lovely I knew immediately that Michele would go home and continue to dress hers. She never fails to impress me by finding exactly the right element that was missing. Just last week she emailed to tell me she was still tweaking the art doll on the bookmark we made as our stamp club project, and I could just see that little girl coming to life under her expert hands.
So I'll be packing vintage tickets & stamped ticket strips in every kit for Cincinnati, but I'll also be packing some of all the other goodies just in case someone wants to take that road less traveled.
Will I see you there in my class? Hope you've been inspired. I certainly was, so a huge thank you to my guinea pigs. You gals rock!!
For a guinea pig class I put out 10 times what I'll pack for an actual out-of-state class, so options were overwhelming. Roofing choices included vintage tickets, miniature playing cards, fortune cards & zodiac cards from old vending machines, Chance & Community Chest cards as well as Monopoly money, Funny money from another game, wooden sticks, wooden nickels, wooden tape measure pieces, cigar box bands, cigar bands, buttons, and a huge wooden cigar box filled with every kind of game piece from dominoes & checkers, to Monopoly houses & hotels, bingo markers, tiddly winks, and oodles more.
I also had photocopies of old train tickets, war tokens, & tape measures of every color. I just knew the tape measures would be a huge hit, but alas, I was mistaken. Another option were photocopied sheets of letters and numbers, which were also not chosen. At CHA there was a picket fence in the Ranger booth, with each picket stained a different color with their line of Distress Stains, so I put out coffee stir sticks as well as decorative wooden sticks which I could just envision stained and applied to the roof of a house. I guess not seeing that picket fence in person explains why no one went for the wooden rooftop.
So the big surprise was that everyone used the vintage tickets. Sharon & Michele went for the green ones while Mary went for faded red. Sharon added cigar box bands at the top and on the edges. Michele had her Martha Stewart fringe scissors so she used funny money on the eaves of her roof, which she turned into fringe. Mary used a piece of corrugated cardboard across the peak of her roof as an accent.
Here's a close up of Sharon's roof, and I see she also included a row of the red tickets.
This is Mary's roof. Notice how she turned her tickets to create the look of tiles overlapping one another.
And this is Michele's roof with the green tickets turned so that the holes were lined up on the outer edges. But look closely at that fringed money. Way cool!
Each kit also included strips of stamped tickets (images by Invoke Arts). Mary used individual tickets on the back of her house with rows of them under the eaves on the front.
Michele added a wooden nickel on the back and used the ticket strips on the front.
Sharon used ticket strips on the front but used just her metal elements and eco board on the back.
The final note I'd like to add was that I had a pack of 250 sheets of paper, with about 2 dozen already pulled out, and everyone made their selections from the ones I'd originally chosen. Michele narrowed her choices down to 3, all with green, but in the end changed her mind and went with a collaged pattern in browns.
Sharon went with a beautiful blue, which isn't a color she uses much, but at the end, her color palette for the entire house could be found on the shirt she was wearing.
Mary had never taken a class with me and had certainly never been anyone's guina pig, so I really didn't know what to expect from her. She worked slower, taking time to experiment with different embellishments, and that was interesting to watch. When she commented that she wanted a clock to go with a ticket that read "the time is now", I pulled down a jar full of watch faces & parts. The one she selected was white and everyone encouraged her to add color since nothing on the house matched that stark white. And of course they were right as we pointed out options for adding color to metal.
A new product I brought home from CHA was Inka Gold by Viva. This is a waxy colorant that you apply with your fingers and buff with a dry cloth. Their advertising calls it a metal gloss paint, but it's not at all what you'd expect. If you scroll back up and click on the individual photos of each house where Tim's Ideaology frames and coins are featured, the photo will enlarge so that you can look for the detail.
On Mary's frame she chose a green and applied it just on the oval ring of the frame. On Michele's house she chose a pink and applied it in the same way on the frame but completely covered her metal coin that says Believe. On Sharon's house she used gold and covered the entire metal frame. In person, it was a fabulous yellow. And when you look at that photo, look at the imagine coin. She added the yellow over the entire thing and then highlighted with the pink.
I wasn't sure about packing them for the class but the girls made the decision for me. It's a must have for everyone to try.
I confess that a bonus for me as an instructor is wandering around a classroom to view the color choices people make. You can always find someone who loves purple in a large classroom, or the girls who go for the shabby chic look.
And while the houses were lovely I knew immediately that Michele would go home and continue to dress hers. She never fails to impress me by finding exactly the right element that was missing. Just last week she emailed to tell me she was still tweaking the art doll on the bookmark we made as our stamp club project, and I could just see that little girl coming to life under her expert hands.
So I'll be packing vintage tickets & stamped ticket strips in every kit for Cincinnati, but I'll also be packing some of all the other goodies just in case someone wants to take that road less traveled.
Will I see you there in my class? Hope you've been inspired. I certainly was, so a huge thank you to my guinea pigs. You gals rock!!
Tuesday, July 26, 2011
Dresses at CHA Summer
If you read my post after attending Winter CHA in California, you saw the scrapbook paper dresses. Well check these out:
This is an art journaling paper dress by Julie Fei-Fan Balzer. No kidding. How incredible is this?
How about this one? The skirt is made of broken tea cups and saucers. Can you see all the cup handles?
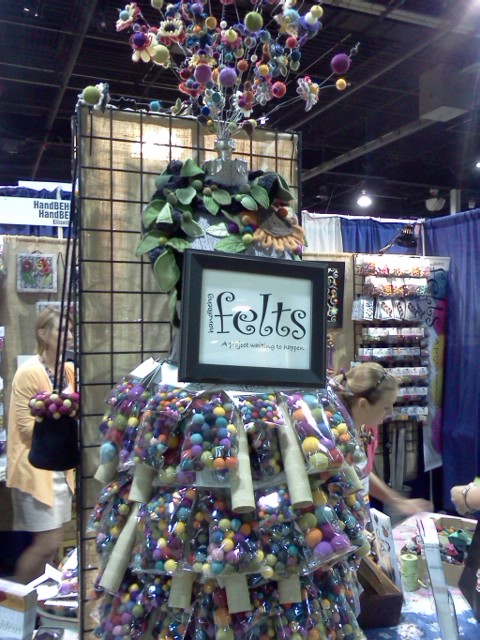
And this one dressed in packages of felt balls. You've gotta love all this imagination.
This is an art journaling paper dress by Julie Fei-Fan Balzer. No kidding. How incredible is this?
How about this one? The skirt is made of broken tea cups and saucers. Can you see all the cup handles?
And this one dressed in packages of felt balls. You've gotta love all this imagination.
Motherboards and Art Doll Bookmarks at STARS
Hello,
I've returned from a week in Chicago attending Summer CHA (Craft & Hobby Assn), and before telling you all about the show I wanted to show you projects from this month's STARS meeting.
For years I've been teaching a class I call my "motherboard". In recent years there have been magazine articles referring to this type of art as "masterboards". Doesn't matter to me what you call it. My idea was to create colorful, layered backgrounds that would be scanned into my computer and then printed for use in projects, maintaining the original forever, rather than cutting it up for art.
When I traveled to Orlando for Stampfest last month, I'd made photocopies that we used as backgrounds for ATC's, which were housed in our Elevated ATC Shrines by Coffee Break Designs.
So for stamp club, I pulled out some of those same copies, stamped my favorite art doll from Teesha Moore, and then let the ladies choose one to decorate in the creation of a bookmark.
Normally I'd want this doll layered and dimensional, but to save your spot between pages of a book, flat was required.
Everyone was given a white pen from Ranger's Inkssentials line to add accents. I also had a few white Marvy Reminisce gel pens which are also fabulous for everyone to try and compare.
So let's start at the beginning. I stamped the art doll on copies of my backgrounds. Next I used some of my newest rubber stamp purchases from Lost Coast Designs and stamped more of the motherboard copies, giving the girls a contrasting background to use in the creation of a hat. The dolls were layered onto scrapbook paper, hats were added, and then the doodling in white gave each one their own unique personality.
Sharon's doll had a dunce-type hat while Michele used 3 of them to create a different look. But notice the patterns on the dresses. Sharon chose to add accents to her dress while Michele accented a dabber dot only.
I love the pattern on this dress that I created with a stencil and white paint, but look at the hat Janie added with a wide brim. She also created a choker and straps for sandals. And she chose to highlight some of the stencilled areas as well. This doll wears a crown.
And this one has punched dragonflies added to her dress.
I confess I love this background, created with a stencil from Coffee Break, and the colors of ink I'd used, but notice she has tiny punched swirls added. And the image I stamped on extra pieces that created her hat is truly going to be a favorite for a long time.
Our swap for July was bookmarks so I found it appropriate to let everyone create an extra one as the monthly project. I was busy pulling more supplies and didn't make one at all, but of course you know I will...later.
I've returned from a week in Chicago attending Summer CHA (Craft & Hobby Assn), and before telling you all about the show I wanted to show you projects from this month's STARS meeting.
For years I've been teaching a class I call my "motherboard". In recent years there have been magazine articles referring to this type of art as "masterboards". Doesn't matter to me what you call it. My idea was to create colorful, layered backgrounds that would be scanned into my computer and then printed for use in projects, maintaining the original forever, rather than cutting it up for art.
When I traveled to Orlando for Stampfest last month, I'd made photocopies that we used as backgrounds for ATC's, which were housed in our Elevated ATC Shrines by Coffee Break Designs.
So for stamp club, I pulled out some of those same copies, stamped my favorite art doll from Teesha Moore, and then let the ladies choose one to decorate in the creation of a bookmark.
Normally I'd want this doll layered and dimensional, but to save your spot between pages of a book, flat was required.
Everyone was given a white pen from Ranger's Inkssentials line to add accents. I also had a few white Marvy Reminisce gel pens which are also fabulous for everyone to try and compare.
So let's start at the beginning. I stamped the art doll on copies of my backgrounds. Next I used some of my newest rubber stamp purchases from Lost Coast Designs and stamped more of the motherboard copies, giving the girls a contrasting background to use in the creation of a hat. The dolls were layered onto scrapbook paper, hats were added, and then the doodling in white gave each one their own unique personality.
Sharon's doll had a dunce-type hat while Michele used 3 of them to create a different look. But notice the patterns on the dresses. Sharon chose to add accents to her dress while Michele accented a dabber dot only.
I love the pattern on this dress that I created with a stencil and white paint, but look at the hat Janie added with a wide brim. She also created a choker and straps for sandals. And she chose to highlight some of the stencilled areas as well. This doll wears a crown.
And this one has punched dragonflies added to her dress.
I confess I love this background, created with a stencil from Coffee Break, and the colors of ink I'd used, but notice she has tiny punched swirls added. And the image I stamped on extra pieces that created her hat is truly going to be a favorite for a long time.
Our swap for July was bookmarks so I found it appropriate to let everyone create an extra one as the monthly project. I was busy pulling more supplies and didn't make one at all, but of course you know I will...later.
Thursday, July 7, 2011
STARS Challenge
A couple of months ago during stamp club we were trying to come up with an idea for a swap. This month for instance we're swapping bookmarks again, something we haven't done in a while. Instead of a swap we agreed to a challenge. Everyone brought a ziploc bag of goodies that included handmade paper, scrapbook paper, stamped images, die cuts, stickers, ...just oodles of stuff. We all took home a bag and returned last month with a finished piece for the owner of the bag.
The above 5x7 legal pad was covered by Laurie for Sharon, using the papers, rub-ons, etc that she'd included in her bag. Notice the alcohol inked metal washers strung across the top?
Joyce chose my bag and completed this scrapbook page for herself, featuring a photo of her granddaughter. That 12x12 sheet was actually created by Joyce with strips of papers I'd cut up. The die cut birds were plain white but she decorated them to match.
Lyn had filled her bag with stamped images related to golf, and Michele made her a portfolio from a colorful file folder, using those images and adding lots of fun elements.
Pockets filled with handmade tablets for notes and lists. Lots and lots of pockets with things tucked inside.
Lyn missed the meeting and hasn't picked up her portfolio yet, so if you're reading this, I've spoiled the surprise, but doesn't it make you want to race over today??
As usual at the meetings I'm so busy oohing and aahing over everything that I forget to take pictures, so I don't have photos of everyone's projects.
But I did take a photo of the shadowbox collage I made for Michele.
This was a class I taught at Stampaway last year and I had some of them left over so as a last minute decision, I made one using quite a few of the elements she'd tucked inside her big bag. The background was a piece of cupcake scrapbook paper. Honestly, it wasn't a pretty paper, but I spritzed it and stenciled it, turned it sideways to disguise the cupcakes and then tried my best to cover the majority of it.
The roof of one house was heavyweight cardstock she'd run through a texture plate. The second was aluminum flashing tape she'd run through a different texture plate and colored with alcohol inks. And the third was covered with tiny metal cupcake liners.
Two of the houses were covered with papers she'd inked, and one was covered by fabulous tissue paper scraps I'd been hoarding for decades. She'd stamped an "M" on a piece of mulberry paper with fibers, and I colored it to match the background.
We all agreed it was a lot of fun and that we'd take on another challenge like this.
Now doesn't this make you want to get creative with a few friends tonight?
The above 5x7 legal pad was covered by Laurie for Sharon, using the papers, rub-ons, etc that she'd included in her bag. Notice the alcohol inked metal washers strung across the top?
Joyce chose my bag and completed this scrapbook page for herself, featuring a photo of her granddaughter. That 12x12 sheet was actually created by Joyce with strips of papers I'd cut up. The die cut birds were plain white but she decorated them to match.
Lyn had filled her bag with stamped images related to golf, and Michele made her a portfolio from a colorful file folder, using those images and adding lots of fun elements.
Pockets filled with handmade tablets for notes and lists. Lots and lots of pockets with things tucked inside.
Lyn missed the meeting and hasn't picked up her portfolio yet, so if you're reading this, I've spoiled the surprise, but doesn't it make you want to race over today??
As usual at the meetings I'm so busy oohing and aahing over everything that I forget to take pictures, so I don't have photos of everyone's projects.
But I did take a photo of the shadowbox collage I made for Michele.
This was a class I taught at Stampaway last year and I had some of them left over so as a last minute decision, I made one using quite a few of the elements she'd tucked inside her big bag. The background was a piece of cupcake scrapbook paper. Honestly, it wasn't a pretty paper, but I spritzed it and stenciled it, turned it sideways to disguise the cupcakes and then tried my best to cover the majority of it.
The roof of one house was heavyweight cardstock she'd run through a texture plate. The second was aluminum flashing tape she'd run through a different texture plate and colored with alcohol inks. And the third was covered with tiny metal cupcake liners.
Two of the houses were covered with papers she'd inked, and one was covered by fabulous tissue paper scraps I'd been hoarding for decades. She'd stamped an "M" on a piece of mulberry paper with fibers, and I colored it to match the background.
We all agreed it was a lot of fun and that we'd take on another challenge like this.
Now doesn't this make you want to get creative with a few friends tonight?
Subscribe to:
Posts (Atom)